



Brochure laid out as A4 but finished size is large 16mo: scale the design down or ask the printer for a separate A4 sheet?
When a brochure is finished as an A4 layout, it often prints shorter than office printing paper—and most of the time the printer did not trim too much. Office A4 is 210×297 mm, while a commonly used large 16mo finished size in printing is usually around 210×285 mm. The roughly 10 mm difference comes from the gripper margin on the full sheet, trimming, and folding/binding allowance. Based on common 2026 delivery practice, the finished size must be fixed before layout, then the sheet size and file size are worked back from it; the A4 in the file and the finished size a printer can deliver reliably are not the same number to begin with.
A shorter finished size usually comes from these three allowances
A printing press uses grippers to grip the paper edge and feed the sheet; the gripper margin is typically 8–12 mm and cannot carry print. After printing, trimming is needed, typically 2–3 mm per edge; folding, collating, thread sewing and perfect binding also require allowance at the fore-edge and spine side. When these three allowances add up, the finished size that can be cut reliably from one full sheet is a size smaller than nominal A4.
The finished size is not something you simply type into design software; it is a result constrained jointly by the full-sheet size, the number of cuts/ups, and the trimming allowance. Standard (Zhengdu) paper and large (Dadu) paper have different cut counts and can yield different finished sizes: both may be called 16mo, but the large format can reach around 210×285 mm, while the standard format is only around 185×260 mm—a visual difference of more than half a palm.
- Gripper margin: the feed direction cannot carry ink, and the entire strip must be avoided during imposition
- Trimming: three-side or four-side clean cut, with a typical range of 2–3 mm per edge
- Binding allowance: a little more allowance is needed at the spine side and fore-edge; the more pages, the more noticeable it becomes
- Cutting tolerance: a measured finished size within about 1 mm of nominal is a typical range
Four numbers to align before layout
The reason to separate these into three layers is that the numbers belong to three parties: the client cares about the finished product in hand, the printer cares about how the full sheet is imposed and which way the gripper faces, and the designer cares about file dimensions and bleed. If any layer is only mentioned verbally and not written into the file, errors will occur at the handoff.
- Finished size: write it into the contract, proofing order and acceptance form; this is the core external commitment number
- Sheet size and imposition size: ask the printer for the sheet-cutting plan and confirm the gripper direction and how many pieces fit on one sheet
- File size: finished size plus bleed; for spread artwork, calculate by the flat spread size—do not expect scaling to solve it
- Direction marks: mark gripper, paper grain and fold lines in the file, not just in chat records
The order cannot be reversed: set the finished size first, then discuss sheet cutting, and only then produce the file. Finishing the file first and then asking the printer whether it can print is essentially concentrating the rework risk onto the last step. If this step is done solidly, later revision rounds can usually be kept to one or two (experience range, depending on the length of the client's decision chain).
At delivery, rework often comes from these points
A common scene in projects: the client has laid out the text as A4 and finished the cover as A4 too; before printing, the printer imposes for large 16mo, and the finished size is about 12 mm shorter than expected. The constraints are that only one week remains before the deadline and the image assets are final and cannot be reshot; the approach is to re-layout the spread images and edge-to-edge color blocks as a whole and to reset safe distances around the barcode; the cost is redoing the cover plus three spreads, with commonly one to two revision rounds (experience range) and a three-to-five-day schedule extension. Based on typical corporate project delivery practice, most such rework can be avoided by asking about the finished size on the first day of layout.
- Edge-to-edge spread images: artwork made as A4 gets a strip trimmed off in the finished piece, shifting the visual center
- Barcode and QR code too close to the edge: after trimming they are pushed into the quiet zone and cannot be scanned
- Cover and text use two different sizes: the fore-edge is not flush in the bound book, so the cover has to be redone
- Page numbers centered for A4: after binding, the visual center shifts outward and feels awkward when flipping
- Flap width estimated from an old book: the cover flat artwork does not match the text block
Differences in use among large 16mo, standard 16mo and A4
None of the three is inherently more professional; the difference lies in use and cost. A4's advantage is that office printing and digital short-run printing are available everywhere; its disadvantage is that when printed on a large offset press, imposition utilization is average and paper waste is somewhat higher. Large 16mo is currently a more commonly used format for brochures and periodicals; it looks close to A4 and printers have mature imposition for it. Standard 16mo is more compact, and for text-heavy booklets it saves more paper.
- A4 (210×297 mm): internal materials, conference handbooks, and scenarios that need to be mixed with office documents; digital short-run is convenient, but formal press printing must accept imposition waste, with paper consumption typically a few percentage points higher than large 16mo (experience range)
- Large 16mo (commonly around 210×285 mm): brand brochures, product catalogues, periodicals; matches imposition on large (Dadu) paper, is a more common choice in 2026, and offers relatively stable paper consumption and lead time
- Standard 16mo (commonly around 185×260 mm): text-heavy books with many pages that are sensitive to press sheets; paper consumption can typically be saved by 5%–15% (experience range, varying with page count and imposition)
- Custom formats: high recognizability, but require separate sheet cutting, and both paper consumption and lead time increase; for small runs the unit price is commonly higher than regular formats, so it is not recommended to start there
In terms of lead time, the three do not differ much; what really creates the gap is page count and binding method. The cost of choosing the wrong size is often higher than the paper consumption itself. If the run is small and the deadline is tight, first ask the printer whether it can cut a separate sheet to the target finished size, and then decide whether to scale the whole design down or re-layout; this is usually more efficient than arguing afterward.
At acceptance, these points must be met to pass
Acceptance is not recommended by feel alone. Use a steel ruler to measure the length and width of three finished books; falling within ±1 mm of the nominal value is a typical range. Then check whether the fore-edge, head and foot are flush, and whether spread images are misaligned at the gutter. Printers usually provide a white proof or blue-line proof; checking whether the finished-size line and fold lines match is far more useful than arguing afterward.
- Measured finished size matches the contract, with tolerance within the experience range
- Spread image seams show no obvious misalignment, and edge-to-edge elements have not lost key information to trimming
- Spine text is centered and aligns with both the front and back covers
- Barcode and QR code fall completely within the safe area and can be scanned in testing
- Text block and cover have the same finished size, and the fore-edge is flush
Applicable scenarios and boundaries
Brochures, periodicals, books and corporate yearbooks that go through formal printing and have a binding step all fit the size-alignment approach above. For projects with many pages and thread-sewn perfect binding or hardcover binding, the earlier the finished size is set, the easier it becomes. When Xiyue Company takes on such brochures, it usually obtains the printer's sheet-cutting plan before starting layout.
Conversely, several situations do not need to follow this approach: for single-sheet digital printing or a few dozen internal circulation copies, printing directly on A4 paper is faster; for PDFs delivered purely electronically, the size can be set for the reading device and does not need to accommodate sheet cutting; for small items with very few pages, only foil stamping, or single cards, using a small-format machine is actually more cost-effective.
Next time you make a brochure, ask the printer three things on the first day of layout: what finished size is set, which way the gripper faces, and how many pieces fit on one sheet. Write these three numbers into the file naming and proofing order; this is much easier than measuring the finished product afterward and arguing about responsibility. If the project uses a custom format or hardcover binding, it is advisable to confirm the sheet-cutting plan together at the quotation stage.
Common questions
The finished brochure is shorter than A4—did the printer trim too much?
Most likely not. The full sheet needs gripper margin, trimming and binding allowance, and the finished size is often worked back from the number of cuts/ups. If the contract says A4 but the measured size is more than 10 mm shorter, then check the proofing order and sheet-cutting plan.
The file is already laid out as A4—can we just ask the printer to scale the whole thing?
Scaling the whole thing changes the font size, leading and effective image resolution, and the barcode size changes too. A 4% reduction may not look like much, but for formal printing it is usually less reliable than re-laying out to the finished size.
If we send an electronic PDF as A4 for client approval first, will it affect printing?
The approval copy can be issued as A4, but it should be marked as a reading copy; the print-ready file needs to be saved separately at the finished size plus bleed. Mixing the two versions is a common source of rework.
Do saddle stitching and perfect binding produce different finished sizes?
The nominal finished size can be the same, but saddle-stitched pages creep outward, and the fore-edge trim is often greater than with perfect binding; with many pages, the finished height may differ by 1–2 mm, so it is advisable to output separate files.
If we want a custom format, can it be exactly A4 size?
Yes, but you have to accept separate sheet cutting, and paper consumption and lead time often increase; for small runs, many printers use large-format digital machines plus die cutting, and the unit price is usually higher than regular formats.
-
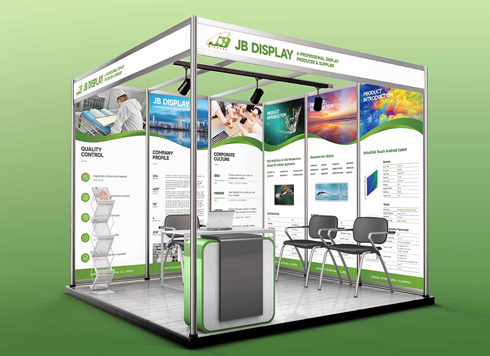 Booth Poster Design for Professional Monitor Product Suppliers
The standard exhibition booth poster projec ...
-
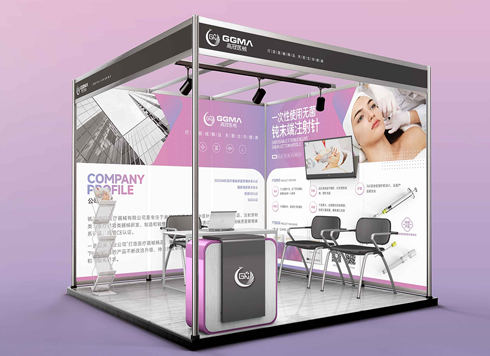 Design of Standard Exhibition Booth Posters for Beauty Instruments
Carefully designed a standard exhibition bo ...
-
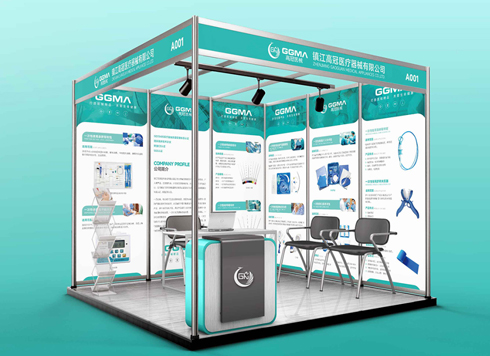 Design of Exhibition Posters for Medical Device Standards
XiYue is designing an exhibition booth post ...
-
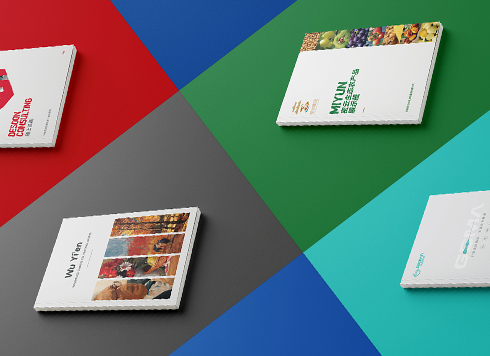 Collection of Brochure Design Cases in 2024 (Cover Series 02)
Our brochure design projects focus on diver ...
-
If the logo is finalized and I only received a PDF, and we need to switch printers for packaging next month, can I still ask for the source files now?
Date: Nov 2, 2026 Read: 1
-
Does the main packaging headline font need a separate commercial license—should the designer swap it out or should the brand buy it?
Date: Oct 31, 2026 Read: 12
-
If a storefront poster headline looks gray from two meters away in daytime backlight, should I enlarge the text or change the background color?
Date: Oct 30, 2026 Read: 9
-
A thin booklet starts every chapter on a right-hand page and adds 10+ blank pages—should you change the binding first or the chapter-start rule first?
Date: Oct 29, 2026 Read: 16
-
Why do dealer-made store posters from the manual have thinner headline type than HQ’s?
Date: Oct 28, 2026 Read: 20