



When only a palm-sized area is left on the back of the pack and the barcode, net content, and ingredient list are all crammed together, what should be protected first?
Conclusion first: When the back of the pack is crammed, the more reliable order in 2026 is “first lock the minimum character height for the barcode and net content, then compress the brand story and selling points, and only then change the box type or add a panel.” Shrinking the font across the whole layout often saves one or two days of artwork revision time, but the cost is pushed to the finished product: it cannot be scanned at the checkout, and reversed-out small text blurs into a solid mass on corrugated or flexo printing. The basis for judgment is not whether the artwork looks crowded, but whether the finished product can be read and scanned in front of the shelf and at the checkout.
The back of the pack is not there for decoration
The front has to be recognized from three meters away; the back has to be read clearly within thirty centimeters: ingredient list, net content, producer information, shelf life, storage conditions, product standard, warnings, and barcode. The two sides are judged by completely different standards. If the back is laid out according to the visual rhythm of the front, the most common result is that selling points crowd out legal information and QR codes eat into the barcode quiet zones.
Under common 2026 project practice, back-panel content is roughly divided into three layers:
- Non-negotiable: net content, ingredient list, nutrition information panel, producer and address, shelf life, storage conditions, product standard, required warnings, and barcode.
- Compressible: brand story, origin story, list of selling points, usage-scene images, and QR code.
- Can be moved out: long usage instructions, preparation steps, traceability and customer service information can go on an insert card, belly band, side panel, or product detail page.
The essence of not fitting is usually not that there is not enough area, but that the first layer was not locked down first and the third layer was never intended to give way.
Why is it always the back that does not fit?
Because information for the back arrives in batches. Carton structure and cutting die lead times are long, so they are usually fixed first; design starts by spreading out the front visuals, and the back is left with “the remaining area”; legal copy, nutrition data, and new barcodes often arrive only in the final few days. When all this information lands at the same time on an already full panel, reducing font size looks like the least troublesome route.
A delivery site example: The box type had already been tooled, the net area left for the information zone on the back was about the size of a palm, and the ingredient list from legal arrived two days before proofing, about 40% larger than the reserved area; the barcode was still an image cropped from the online store product page. The approach was to fix the positions first according to the barcode quiet zones and net content character height, move the entire brand story to the side panel, set the ingredient list in two narrow columns and remove repeated modifiers, and move the remaining usage instructions onto an insert card. The cost was an extra proofing round, a production schedule delay of about one week, and an insert card fee; overall cost was commonly 10%–20% higher than the original plan (experience range). If this account is calculated two weeks earlier, most of it can be avoided.
What to protect first: lock two things, then yield on two layers
Legal character height and the barcode are items where “falling below the minimum is a hard defect”; their area is calculated, not negotiated. Story and selling points are items where “one fewer sentence does not affect compliance”; their area can be negotiated. Handling them separately is easier than arguing each time about whether to shrink the font.
- Lock the minimum character height: Based on the current standards for prepackaged labels and the maximum surface area of the package, check the minimum height for characters such as net content (the typical range is divided into 2–6 mm bands; refer to the official published text for specifics), and write the value into the design specification instead of leaving it to visual estimation at proofing.
- Lock the barcode area: First set the position, magnification factor (common practice is in the 80%–200% range), left and right quiet zones, and color combination, avoiding fold lines, windows, seals, and reflective areas of gloss lamination.
- Compress the second layer: Changing the ingredient list to two narrow columns, merging similar selling points, and rearranging the nutrition information panel in the standard format can usually free up 10%–20% of the area.
- Move the third layer: Move stories, long usage instructions, and traceability to the side panel or insert card, and confirm that the new location will not add an extra printing process.
How far is good enough: net content and the barcode become fixed boxes on the artwork, and no later copy adjustment may intrude into them. Writing this into the handover notes works better than verbal reminders.
Shrinking the font, moving information, and adding a panel have different costs
All three routes can solve the problem of not fitting, but their cost structures differ. The ranges below are estimated from common 2026 packaging project delivery experience; actual quotes from local printers and die makers prevail.
- A. Shrink the font: This can commonly be revised within one round and adds almost no cost beyond plate making; the risk is pushed to the finished product—insufficient barcode magnification, blurred reversed-out small text—and once character height falls below the minimum, it is a hard defect that can only be fixed by redoing it later.
- B. Move out or cut information: This requires structural or accessory support and commonly takes 1–2 weeks; cost depends on whether a belly band, insert card, or back label is added. It suits cases with a lot of content that can be layered, but take care not to move legal information away along with it.
- C. Add a panel or change the box type: Die costs commonly fall within an experience range of several hundred to several thousand yuan; die making plus proofing commonly takes 1–3 weeks, and the production schedule is delayed accordingly. This suits long-term core SKUs; promotional packs sold for only one season usually cannot absorb the cost.
What to check for acceptance
Acceptance cannot be done only on screen, nor can a sample from an office printer be used as a substitute. A proof must be made on the actual substrate and with the actual process (lamination, varnish, white ink, flexo, or offset printing).
- Barcode: Use common checkout equipment or a phone and scan successfully more than 3 consecutive times at a distance of 10–30 cm; pay particular attention to white bars on a dark background and black bars on a red background.
- Character height: Measure the character height on the proof with a ruler and compare it with the standard bands, rather than relying on visual impression.
- Small text and reversed-out text: In offset printing, 6 pt and above is commonly more reliable; on flexo and corrugated surfaces, below 8 pt tends to blur (experience range).
- Fold lines and seals: Confirm that no text crosses a fold line and no information sits near a window or tear notch.
When this applies and when not to use it
It applies to categories with mandatory labeling requirements and tight space, such as prepackaged food, personal care, and pet food. It also applies to reprint revisions where the box type has already been tooled and copy arrives late, and to situations where multiple SKUs share one box type and flavors are distinguished by labels.
Boundaries where it does not apply should also be stated clearly: for pure gift boxes and industrial transport packaging without mandatory labeling requirements, the back is mainly brand expression, so there is no need to lock area according to the logic of legal character height. When the box structure is not yet fixed, it is also not advisable to fine-tune the back layout first; at this stage, placeholder blocks plus an information list are easier. If the maximum surface area of the package itself is too small, such as for small sachet samples, shrinking the font cannot solve the compliance problem; an outer box, hang card, or instruction card is usually needed to carry the information.
Frequently asked questions
How much area should be reserved on the back of the pack for the information zone?
There is no uniform number; work backward from the number of mandatory items. As a rule of thumb, first reserve 60%–80% of the back panel’s net area for legal information and the barcode; only the remainder is for brand content. Listing the items first and then measuring the area is more reliable than drawing a layout first and cramming content into it.
Can a barcode be placed directly on a dark background?
It is not recommended in most cases. Barcodes are read through the reflectance difference between dark bars and a light background; white bars on a dark background, black bars on a red background, and glare from gloss lamination are all likely to fail scanning. Switching to black bars on a white background and leaving sufficient left and right quiet zones clearly lowers the probability of rework.
Is it acceptable to place the nutrition information panel as an image?
Not recommended. When an image is scaled, the text easily becomes fuzzy, and changing the formula requires redoing the whole block. Rearranging it as an editable table means data changes only require replacing text, and it is also easier to measure character height during acceptance.
If the box type has already been tooled, is there still room to free up space for the information zone?
Usually yes, by taking a side route: add a belly band, back label, or insert card, and move non-mandatory content to the product detail page. This type of approach commonly takes one to two weeks; it is faster than making a new die and does not disrupt the existing production schedule.
If you are stuck on this right now, you can start with three steps: list the mandatory items and mark their minimum character height, draw the barcode as a fixed box that cannot be intruded upon, and list third-layer content that can be moved out. Under common project rhythms, this can be done within two or three days and often saves one proofing round and one production schedule delay. If the box type is not yet fixed or the category has no mandatory labeling requirements, there is no need to apply this order; moving forward with placeholder blocks plus an information list is more suitable.
-
 Booth Poster Design for Professional Monitor Product Suppliers
The standard exhibition booth poster projec ...
-
 Design of Standard Exhibition Booth Posters for Beauty Instruments
Carefully designed a standard exhibition bo ...
-
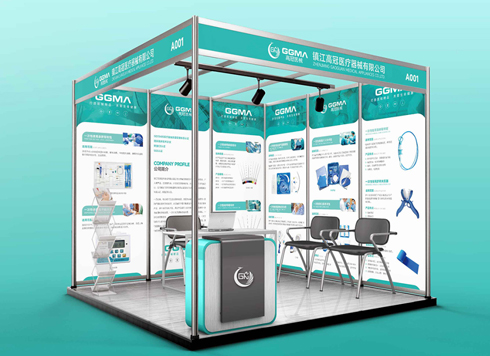 Design of Exhibition Posters for Medical Device Standards
XiYue is designing an exhibition booth post ...
-
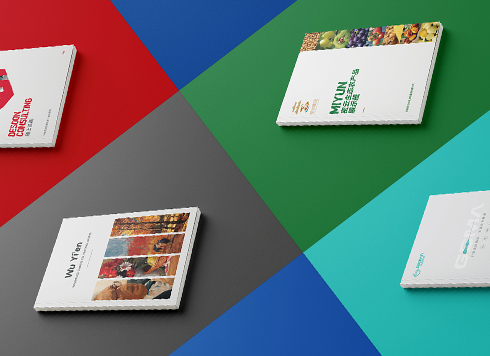 Collection of Brochure Design Cases in 2024 (Cover Series 02)
Our brochure design projects focus on diver ...
-
The ingredient list on a food packaging bag sits on the seal edge and folded corner, and channel acceptance says it is hard to read—is the type too small, or should it not have been placed there in the first place?
Date: Oct 25, 2026 Read: 38
-
Same 32mo trim and 10.5 pt type, nearly 200 fewer characters per page than comparable books—adjust the type area or tighten leading first?
Date: Nov 22, 2026 Read: 3
-
Storefront is installed and packaging is printed—will newly added supporting graphics still match the earlier materials?
Date: Nov 21, 2026 Read: 7
-
Why does a logo look gray when reversed out on dark paper boxes—and what should change in the mono version the maker asks for?
Date: Nov 20, 2026 Read: 8
-
Hardcover Cover Logo Foil Stamping: If Fine Strokes Smudge in the Proof, Should You Change Line Width or Switch Paper First?
Date: Nov 19, 2026 Read: 12