


Double-sided hanging banners look opaque in-store, but at the doorway in sunlight the reverse artwork shows through—which light should acceptance be judged under?
When a double-sided printed hanging banner is hung at a doorway and sunlight or sky shines through from behind, the reverse artwork floats up like a shadow. This is usually not simply “paper too thin” but the combined result of paper opacity, ink density on both sides, post-press/finishing structure, and viewing light source. A more practical acceptance approach works in reverse: first confirm whether this item will be backlit by light in normal use, then check whether dark areas on both sides overlap in position, and only then discuss whether to change paper. Based on 2026 project delivery practice, doing one window-light sample check with production paper stock before printing double-sided materials for backlit viewing conditions can prevent most rework.
There are two kinds of show-through, and they need completely different fixes
On site, saying “it shows through” often mixes two things together. The first is ink penetrating from the front to the back; when you turn it over, you can see ink spreading and the color looking darker—this is ink penetration. The second is the paper itself being semi-translucent, so the artwork printed on the back shows its outline on the front—this is paper translucency. The way to tell them apart is crude but effective: turn to the back and see whether ink has spread, then hold the sample against a window and see whether the reverse artwork's outline appears on the front.
Reducing ink laydown is basically ineffective for translucency-type show-through—this is an easy place to spend money in the wrong way. Many rework attempts try to fix “the paper itself is translucent” by treating it as “too much ink,” and the money is spent while the problem remains. Only ink penetration corresponds to reducing ink laydown, switching to paper that holds ink more stably, or adjusting drying and stacking conditions.
- Translucency-type show-through is usually amplified under three conditions: large solid dark areas, overlapping artwork positions on both sides, and a light source behind the material when viewed.
- Ink penetration is often accompanied by a sticky feel on the back and smudging when stacked.
- The two can occur at the same time. Identify the main cause first, then decide whether paper needs to change.
Fine in the shop, visible only at the doorway: the viewing condition is what changed
Proofs are usually checked on a desk under white light, where paper is seen by reflected light and show-through is not obvious. A hanging banner at a doorway has sky, glass, or street behind it during the day, which effectively adds a backlight to the sheet and immediately amplifies show-through. The same applies to double-sided stickers applied to glass and double-sided cards installed in light boxes: these are all materials whose viewing condition includes backlight, so judging them by a desktop appearance is the wrong standard from the start.
Another common trap is that the paper used for the proof is not the same as the production paper. Digital proofs often default to a heavier, more opaque proofing paper that feels substantial, but the actual print on thinner double-sided paper shows through. A common situation in projects is: color has been approved, files have output normally, and the problem is that no one stacked the two sides' samples together and looked at them against a light.
- Counterexample: confirming only a single-sided digital proof and never stacking the two sides back-to-back against a window.
- Counterexample: signing off under office fluorescent light without viewing the material at its final hanging position.
- Actionable step: take production paper samples (A4 size is enough), print one solid dark area on each side, and check against a window or phone flashlight. This is more reliable than checking a screen or a proof.
Four handling paths and rough cost comparison
Divide by “which layer the change lands on”: changing artwork affects the design layer, changing the hanging method affects usage, changing paper affects the substrate, and adding structure affects the process. The benefit of this division is that cost and lead-time increases are roughly predictable, making it easier to trade off budget and delivery date instead of jumping straight to changing paper.
- Change the reverse artwork: lighten or clear dark areas that overlap with the front, and move the main visual down to avoid faces, main headlines, and QR codes. Material cost is basically unchanged, lead time is unchanged, and the effect is moderate. Be careful not to make the back so light that it cannot be seen under normal light.
- Change the viewing method: increase the distance between the banner and the wall or glass, add a backing board or liner, and avoid positions directly facing the light source during the day. Cost is relatively low and lead time is short; this is mitigation, not a root fix, and the problem may return when the material is reused.
- Change paper or increase grammage: choose a more opaque paper type, or raise grammage to around 150 gsm (experience range, depending on use). Material cost typically rises by 5%–20%, and lead time is basically unchanged; after changing paper, recheck hole punching, stringing, and fold spring-back.
- Add a layer in structure: print each side separately and mount them together, insert a thin sheet in between, or in digital and UV output print white ink first and then color. Cost typically rises by 30%–60% (experience range), lead time typically increases by 2–3 days, and it affects drape and front-to-back registration accuracy.
When both budget and lead time are tight, the usual priority is 1 → 2 → 3 → 4. If the material will be reused long-term and repeatedly appears in strong backlight positions, starting directly from 3 or 4 is usually less trouble. The basis for judgment is not whether the paper is good, but whether this item will be penetrated by light from behind.
The on-site cost of skipping the window-light sample check once
A common constraint in projects is a tight budget, only three days, and artwork from a previous year. The usual approach is to leave the paper unchanged first: lighten the two dark backgrounds on the back, leave white directly behind the face area on the front, and reduce show-through from “outline visible at a glance” to “noticeable only up close.” The tradeoff is that the back visual becomes weaker, which needs to be explained to and confirmed with the client in advance. In another case, production paper samples were not checked, and under on-site backlight the shadow of the back logo landed exactly on the model's face, forcing rush reprint. Rush material fees typically run around 10% of the contract value (experience range); the more expensive cost was losing a day of installation time. This is why backlit materials should be checked with paper samples first, before discussing design details.
Boundaries of when this applies and when it does not
One-sentence test: will this item be penetrated by light from behind in normal use? If yes, treat it as a backlit material and define paper, artwork, and hanging method together. If no, there is no need to upgrade paper or process for show-through.
- Suitable for advance handling: materials with built-in backlit viewing conditions such as hanging banners, hanging valances, double-sided glass stickers, double-sided light-box cards, and double-sided menu pages; designs with large dark areas on both sides that overlap in position; outdoor materials that need to be reused across seasons.
- No need to upgrade: single-sided prints or materials with mostly white backs; brochure inner pages, business cards, and certificates viewed only under indoor reflected light; one-off event materials used for only half a day with a very tight budget, where changing the reverse artwork or moving the hanging position usually suffices.
- Boundary reminder: whether show-through is acceptable depends on viewing conditions, not on paper parameters alone. The same paper can look fine on a desk but fail at a backlit window; do not apply experience from one scenario to another.
FAQ
If a double-sided print is laminated, does that stop show-through?
Lamination mainly changes surface texture and abrasion resistance, with limited improvement in translucency. Thin paper with large dark areas will still show through, so the sample still needs to be checked against a window under the final light source. Do not treat lamination as a fixed solution.
With the same paper, why does red show through more obviously than black?
Visibility depends on luminance contrast: black darkens the whole area, so an outline is easily read as a shadow; highly saturated red or orange on a light background has sharper edges and is therefore more noticeable. When judging, look at the luminance contrast between the reverse artwork and the front background color.
If show-through is discovered only after printing, is there any room to fix it?
Yes, but only to mitigate: add a backing board or liner, move the hanging position from directly facing the light source to a side angle, or darken local front areas to increase contrast. The paper itself cannot be changed, and the problem may recur when the material is reused.
For an event hanging banner with only a few dozen copies, is it worth changing paper for this?
Usually changing the design first is more cost-effective: offset overlapping dark areas on the two sides and leave white behind the main front visual, with basically no cost change. Changing paper and adding structure are better suited to cases that will be reused or have relatively large quantities.
Next time you make double-sided materials, do one window-light sample check with production paper stock before printing, mark the dark areas that overlap between front and back, and then decide whether to change paper. For items hung long-term in backlit positions, prioritize changing paper or adding a layer. For items viewed only under indoor reflected light and already white on the back, there is no need to add cost and lead time for show-through.
-
 Booth Poster Design for Professional Monitor Product Suppliers
The standard exhibition booth poster projec ...
-
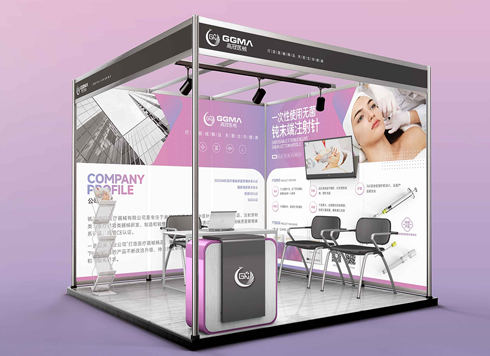 Design of Standard Exhibition Booth Posters for Beauty Instruments
Carefully designed a standard exhibition bo ...
-
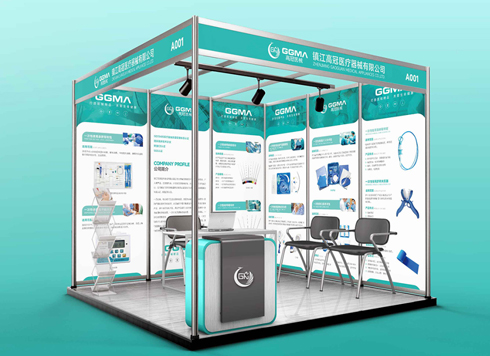 Design of Exhibition Posters for Medical Device Standards
XiYue is designing an exhibition booth post ...
-
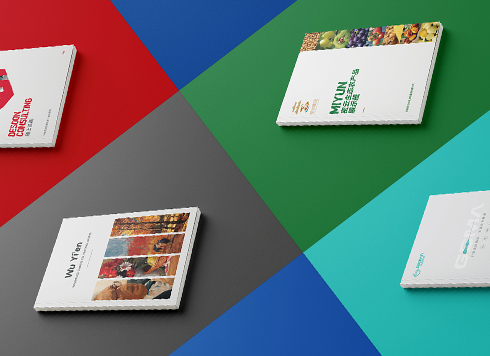 Collection of Brochure Design Cases in 2024 (Cover Series 02)
Our brochure design projects focus on diver ...
-
If 80g brochure text paper shows image shadows through dark spreads and the printer says it is normal, which page should acceptance be based on?
Date: Oct 26, 2026 Read: 40
-
When a sample is shipped to another city and the client only signs back “OK,” who is to blame if mass production shifts color? Were the reference and tolerance missing from the approval form from the start?
Date: Nov 22, 2026 Read: 5
-
When text at both ends of a banner is pinched by rope, is moving the text inward enough—and should hole positions and hanging method be marked together?
Date: Nov 21, 2026 Read: 5
-
When the company name on a booth fascia can’t be read across the aisle, can checking letter height and stroke weight against the far viewing distance before artwork start save a reprint?
Date: Nov 20, 2026 Read: 11
-
The address along the bottom of a roll-up banner keeps getting covered by the base—can leaving a keep-out zone from the supplier die line before artwork save a site rework?
Date: Nov 19, 2026 Read: 14