



Spot UV on a Brochure Cover Looks One Ring Wider Than the Logo Edge Under Angled Light but Not Head-On—Normal Tolerance or Rework?
A slight offset between spot UV and the artwork edge on a brochure cover is usually not simply the printer’s registration being off. More often, three things were not fixed before artwork release: whether the varnish area was made into a separate solid spot-color plate, whether the UV shape is vector or rasterized, and how much the paper and lamination stretched before the UV step. Based on 2026 project delivery experience, an offset of 0.1–0.3 mm is mostly within the normal finishing registration range and can be seen by eye only under angled light; once it exceeds 0.5 mm or the entire artwork block shifts together, you should generally go back to the file level to find the cause rather than starting with the printer. Below, we break it down in the order of “plate—shape—material—press.”
1. Spot UV Adds One More Plate Than CMYK: Check “Plate” and “Shape” First
Spot UV is not as simple as “adding a glossy effect to the artwork.” After CMYK printing is complete, a separate varnish plate applies UV varnish only to the designated areas, which are then instantly cured by UV lamps. It inherently adds an independent press run and an independent registration step compared with CMYK, and one more plate means one more chance for alignment error. This is also why the same artwork can be laminated without “misalignment” but spot UV can show it.
Looking at three common finishing methods together, the alignment logic is clearly different:
- Lamination: full-sheet lamination; there is no alignment issue, only gloss and adhesion issues. Cost commonly falls within an experience range of a few to a dozen-plus yuan per square meter and is usually completed together with printing.
- Spot UV: requires a separate varnish plate and has registration requirements. Cost commonly combines area pricing plus a plate fee; for short runs, the plate fee share is noticeably higher.
- Foil stamping: requires a stamping die; alignment precision is high but limited by character height and stroke width, so small text and fine lines easily fill in or blur.
To diagnose this type of issue, a safer sequence is to eliminate causes layer by layer from file to press, because changes at earlier stages cost less. You can use a four-layer check: “plate—shape—material—press.” First, check whether the varnish plate is output separately and whether the spot color name is unique; then check whether the UV area is vector or raster; then check paper stretch and lamination sequence; only after that check registration accuracy, UV lamp power, and sheet-feeding stability. After the first three layers are ruled out, it is not too late to ask the printer for a registration proof comparing the varnish plate and the CMYK plates.
The reason for this division is straightforward: a file problem may require only tens of minutes to re-output a varnish plate, while a press problem could mean reprinting the whole batch. Using low-cost checks to rule out high-cost causes is a safer order on the production floor.
2. Clarifying the Varnish Plate at Artwork Stage Is More Useful Than Arguing Later
The real watershed for spot UV is at artwork stage. Before delivery, check first: whether the UV area has been set as an independent solid spot color, whether the edge should be inset or outset, and whether the finishing sequence has been confirmed with the printer. Based on common practice in 2026, it is advisable to inset the varnish area from the artwork by an experience range of 0.1–0.2 mm, to avoid varnish overflowing the artwork outline and forming a ring of “shiny edge” under angled light. That shiny ring is exactly the real source of what many clients describe as “looking slightly misaligned.”
- Color value: 100% solid spot color; do not use 60% or 80% tint values. Spot UV usually has only two states: “on” and “off.”
- Shape: convert everything to vector paths; remove feathering, outer glow, and semi-transparent overlays.
- Labeling: mark it on a separate page or separate layer as “varnish plate, not a printing color” to avoid it being printed as a fifth color.
- Sequence: confirm in writing with the printer whether UV comes before or after lamination; this directly affects adhesion and rework risk.
- Acceptance criteria: observe under 45-degree angled light; the deviation between the varnish edge and artwork edge should be within the experience range of 0.1–0.3 mm, with no missed areas and no varnish overflow—not judged by whether it is invisible from a straight-on view.
One more point is easily overlooked: most digital proofs cannot reproduce the real effect of spot UV and can only indicate position. Treating a digital proof as the basis for effect approval is a fairly common misjudgment in this type of rework. A safer approach is to first make a blank sample or a small-batch UV trial, confirm the tactile feel and edge within the experience range, and then decide whether to run the full batch.
3. Where Spot UV Fits—and Where It Does Not
Spot UV is suitable for headlines, logos, and key visual outlines placed on large white areas or solid-color backgrounds, where gloss contrast creates depth and the visual benefit is clear. If the cover itself is dark full-bleed plus textured paper, the contrast between UV and the background gets absorbed, and it is almost invisible even when applied.
Unsuitable cases should also be clarified upfront: fine lines, small text, UV areas crossing fold lines, and inner pages that are repeatedly touched by hand are all not recommended for spot UV. Fine lines and small text easily blur at the edges on a varnish plate; areas crossing fold lines can crack under folding pressure; and inner pages that are repeatedly rubbed easily become mottled. Based on 2026 delivery experience, for areas with character height below 5–6 pt and line width below 0.2 mm, spot UV is usually not cost-effective.
- Suitable: brand names in cover white space, graphic outlines on single-color backgrounds, and cover headlines that need contrast with matte lamination.
- Not necessary: short-run materials with tight budget and lead time within three days; digital small batches of only a few hundred copies.
- Not recommended: inner-page body text areas, long strip patterns crossing fold lines, and full-bleed backgrounds on specialty paper with coarse texture.
4. On the Production Floor: How to Trade Off When Budget Is Tight, Lead Time Is Short, and Textured Paper Is Specified
Projects often stack up a set of constraints like this: a tight budget, a lead time of only three or four days, a client-specified high-basis-weight cover paper with texture, and a request for spot UV on the logo. A safer approach is to first change the UV area to pure vectors, inset it by an experience range of 0.1–0.2 mm, and change “UV after lamination” to “lamination after UV” or cancel lamination altogether. The trade-off is slightly lower gloss contrast, but it avoids rework from local peeling caused by unstable adhesion when UV is applied after lamination.
Conversely, if you insist on the original plan and skip samples, one rework usually means reprinting the entire batch of covers, pushing the schedule back at least three to five days. There is no standard answer for this kind of trade-off, but calculating the cost upfront is better than discovering it only after going on press. Here are several pitfalls that repeatedly appear in delivery:
- Pitfall 1: Using a feathered bitmap or layer style for the UV area; after plate output, the varnish edge becomes noticeably wider.
- Pitfall 2: Drawing UV as a light-colored block on the artwork, and it actually gets printed as a fifth color.
- Pitfall 3: The UV area crosses a fold line; after folding, the varnish cracks along the fold into a thin white line.
- Pitfall 4: Confirming the effect only from a screen or ordinary digital proof, then discovering after going on press that the contrast is far lower than expected.
Specific process parameters should still be checked against the printer’s official process instructions and delivery acceptance checklist; equipment varies considerably.
Frequently Asked Questions
How much spot UV misregistration is considered normal?
Based on 2026 delivery experience, a deviation between the varnish edge and artwork edge of 0.1–0.3 mm is within the normal finishing registration range; if it exceeds 0.5 mm or the whole block shifts together, check the varnish plate and file shape first.
Can a digital proof show the real effect of spot UV?
Most digital proofs can only indicate UV position and cannot reproduce gloss or thickness; to judge actual contrast, you usually need a blank sample or a small-batch UV trial before deciding on the full production run.
Can spot UV be applied after lamination?
It can, but adhesion and registration must be re-confirmed. Laminated surfaces do not absorb oil well, so varnish adhesion is weaker; testing a small sample before delivery is recommended.
Is spot UV visible on a dark full-bleed cover?
Contrast is weak. A dark background plus textured paper absorbs the gloss difference; usually only the outline can be seen under angled light, and the visual benefit is lower than on a light-colored white area.
If the cover is about to go to press, do three things first: make the UV area a separate solid spot-color vector, confirm the order of lamination and UV with the printer in writing, and request a small sample to confirm edge and gloss. If the cover is dark full-bleed, textured paper, or the lead time is within three days, it is advisable to give up spot UV and use lamination contrast or foil stamping instead, so both cost and risk are more controllable.
-
 Booth Poster Design for Professional Monitor Product Suppliers
The standard exhibition booth poster projec ...
-
 Design of Standard Exhibition Booth Posters for Beauty Instruments
Carefully designed a standard exhibition bo ...
-
 Design of Exhibition Posters for Medical Device Standards
XiYue is designing an exhibition booth post ...
-
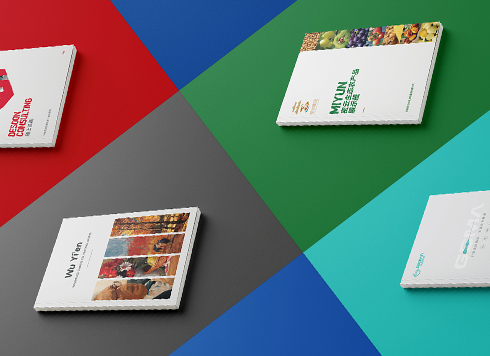 Collection of Brochure Design Cases in 2024 (Cover Series 02)
Our brochure design projects focus on diver ...
-
When a sample is shipped to another city and the client only signs back “OK,” who is to blame if mass production shifts color? Were the reference and tolerance missing from the approval form from the start?
Date: Nov 22, 2026 Read: 1
-
When text at both ends of a banner is pinched by rope, is moving the text inward enough—and should hole positions and hanging method be marked together?
Date: Nov 21, 2026 Read: 4
-
When the company name on a booth fascia can’t be read across the aisle, can checking letter height and stroke weight against the far viewing distance before artwork start save a reprint?
Date: Nov 20, 2026 Read: 10
-
The address along the bottom of a roll-up banner keeps getting covered by the base—can leaving a keep-out zone from the supplier die line before artwork save a site rework?
Date: Nov 19, 2026 Read: 13
-
The booth spotlight hits the center of the display panel, and customers at the meeting table say it is a washed-out white blur—is it material glare or a light mounted too low?
Date: Nov 18, 2026 Read: 18