



Coil-bound desk calendar: why do the first date row and QR code get covered by holes—was the hole template missing at artwork setup, or was the safety area too small?
Bottom line first: when the first date row and QR code on a coil-bound desk calendar are covered by punch holes, the common cause is not that the binder punched off-center. It is that the artwork was set up only to the trimmed size, without counting the punch strip, coil diameter, and page-turn direction into the content safety area. Based on 2026 project delivery experience, the sequence is to define the binding method and page-turn direction first, then request the hole-position template from the binder, draw the hole band and content safety line inside the trim frame, and move dates, QR codes, and important text and images inside the safety line. The purpose is not to leave the layout empty, but to make punch positions visible and checkable at the file stage.
What are the hole line and content safety line in a desk calendar file?
The trim line of a desk calendar is the outer contour after cutting; the hole line connects the centers of the punched holes; the content safety line is the boundary set further inside the hole line. These three lines are not the same. Treating the trim line as the safety line is a common misjudgment in desk calendar layout, especially when the client provides only a trimmed size and no binding template, so the design side tends to assume content can go edge to edge.
Coil binding takes up a strip along the trimmed edge, and paper thickness, coil diameter, and page-turn direction all change the actual occupied area. If this strip is not drawn in the file, a flat proof will not reveal the problem, and after binding the first date row and QR code are the first to be covered. In the common 2026 practice, the binder’s hole-position template is usually provided together with proof confirmation; requesting it at artwork setup saves more trouble than fixing it later.
- Trim line: the outer cutting contour, which determines the final desk calendar size.
- Hole line: the punched-hole center position, with a typical experience range of about 5–10 mm from the trimmed edge, to be checked against the binder’s die and paper thickness.
- Content safety line: for important text and images, an experience range of at least 12–15 mm from the punched edge is suggested; use the upper end when paper is thick or the coil is large.
- Page-turn direction: desk calendar flip, wall calendar flip, or left/right flip determines which side needs a larger clearance.
Why are the dates and QR code often the first things covered by the coil?
Date areas are usually centered and filled to the visual edge, and QR codes are often placed in a corner; both are close to the trimmed edge. If artwork setup provides only a trim frame and no hole-position template, the layout will default to using the whole sheet. The binder punches with its own die, so holes land on the dates; it looks like off-center punching, but in fact the file did not reserve the punch strip.
A common constraint on delivery projects is this: the client provides only the trimmed size and a request to make a 32K desk calendar, while copy and assets are urgent, so the layout is filled directly to the trim frame. When the binder’s proof comes back, the first date row and QR code are covered by the coil; revisions require re-laying out the entire date sequence, and the delivery timeline commonly extends by 2–4 working days. Rush jobs may even be forced to change the binding method. This is an experience range, not a fixed quote, and it is not the same at every binder.
- The artboard was built only to the trimmed size, with no hole-position layer.
- For a double-sided desk calendar, only the front was kept clear; the back dates are still covered by holes.
- Coil diameter was estimated by experience, not checked against paper thickness and page count.
- The QR code was placed in the corner on the punched side; it scans, but after page turns it is often blocked by the coil.
- The proof was checked only as a flat sheet, with no page-turn mockup.
Checking the three lines and one direction before artwork setup: where does it cut rework?
The three lines and one direction refers to the trim line, hole line, and content safety line, plus the page-turn direction. This division exists because the usable layout area of a desk calendar is not the entire trimmed sheet, but the remaining area after binding consumes one edge; only after the direction is set do you know which edge must give way and which edge can be relaxed.
- Define the binding method: coil, perfect binding, saddle stitching, or wire ring binding; different methods occupy different areas.
- Define the page-turn direction: desk calendar flip, wall calendar flip, or left/right flip; mark the binding edge first.
- Request the hole-position template or die line from the binder: draw the hole line according to their die, not by software defaults.
- Draw the content safety line: set it back inside the hole line, and keep dates, QR codes, and the logo within it.
- Make a page-turn proof: bind one copy with the actual paper thickness and coil diameter, then turn to the first row of each month to check coverage.
Each step has a different acceptance standard. If dates are laid out before the binding method is fixed, the whole page may need to move when the hole template arrives; if the safety line is drawn before the template is obtained, the setback may be too small; if only a flat proof is made without binding the coil, page-turn coverage remains invisible. In common project delivery practice, the hole-position template is archived together with the trimmed size and reused at the next artwork setup, avoiding repeated rework on the same desk calendar model.
A qualified file is not one that merely looks like it has white space; it is one where opening the hole-position layer shows the hole line, safety line, and binding-edge marks, and the first date row still has margin from the safety line. An unqualified file is filled to the trim frame and relies only on the binder to avoid the holes as much as possible. Check item by item against the binder’s hole-position template and proof acceptance checklist, not by oral confirmation.
Compared with perfect binding and saddle stitching, when should a desk calendar not use coil binding?
Coil binding’s advantages are that it lies flat and turns pages steadily, making it suitable for desk calendars and date pages that need long-term turning; the cost is that the punch strip takes up layout space, and a full spread image will be interrupted by holes. Perfect binding is more like a small book and suits desk calendars with more text and images, but it lies less flat; saddle stitching suits lightweight desk calendars with few pages, but pages creep when turned. The choice is not about which is popular, but whether pages need to lie flat and whether text and images can avoid the punch strip.
- Layout occupation: coil binding needs a punch strip and content safety area; perfect binding mainly needs a gutter margin; saddle stitching needs allowance for creep.
- Lay-flat effect: coil binding can lie flat at a given page; perfect binding needs pressing; the middle pages of saddle stitching tend to spring back.
- Suitable page count: coil binding commonly handles from a dozen to several dozen pages; perfect binding can handle more; saddle stitching suits thinner booklets.
- Cost and lead time: coil binding is commonly priced per copy and by hole count; proofing and binding usually add 1–3 working days, depending on the binder’s schedule. This is an experience range, not a fixed quote.
- Not suitable: when a full-spread photo must not be interrupted, for very small desk calendars, or when a hardcover gift-box feel is required, coil binding may not be suitable; in such cases, switch to perfect binding or a cardstock easel stand.
If the core image of the desk calendar must run as a full spread and cannot accept interruption by holes, or if the trimmed size is very small and the punch strip takes too high a proportion, there is no need to force coil binding; conversely, when date pages need long-term turning and must lie flat on a desk, coil binding is a better match.
Applicable scenarios and boundaries
It suits desk calendars, wall calendars, menus, samples, and other date-related materials that need to lie flat and turn pages; when text and images can be divided into zones and the binding-edge occupation is acceptable, coil binding gives a relatively steady page-turn experience. A common 2026 practice is to settle the binding method and hole-position template before artwork setup, then move into layout design.
Not suitable, or no need to use it, for: a full-spread key visual, a very narrow trimmed size, a giveaway card with very few pages, or a gift-box desk calendar that needs hardcover finishing. The boundary is not whether coil binding is popular, but whether the content can yield a binding strip; if it cannot, change the binding method rather than forcing it in by compressing the safety area.
Judgment standard: only when the binder’s hole-position template is available before artwork setup, the page-turn direction can be determined, and dates and QR codes can be placed inside the safety line does the layout meet the conditions for coil binding; if any one of the three is missing, do not fill the dates edge to edge yet.
- Suitable: date pages need long-term turning, pages need to lie flat, and text and images can be divided into zones.
- Not suitable: a full spread cannot be interrupted, the trimmed size is very narrow, or a hardcover gift-box feel is required.
Common questions
How far is the punch position from the trimmed edge on a desk calendar?
A common range is about 5–10 mm from the hole center to the trimmed edge, checked against the binder’s die and paper thickness; it is safer to set content at least 12–15 mm further inside. This is an experience range.
Can punch holes cover artwork?
They can cover background patterns that carry no information, but dates, QR codes, logos, and fine-stroke text should not go into the punch strip; if artwork is covered, you must also accept the visual effect of holes interrupting it.
Does the back of a double-sided desk calendar also need hole clearance?
Yes. The coil passes through the whole calendar, so the same position on the back is also occupied; clearing only the front is a common rework point, and the first date row on the back must also stay back from the safety line.
What if the binder’s hole-position template does not match my trimmed size?
First check the trimmed size and cutting method, then ask the binder to issue a template for the actual format; do not directly use a scaled template, because hole spacing and margins will be enlarged or reduced together.
Are the safety areas the same for wire ring binding and double-loop wire binding?
Not exactly. Ring diameter, opening and closing method, and hole spacing differ, so the occupied width can vary; redraw the safety line according to the template for the corresponding binding method, and do not reuse the setback from another method.
If you are now laying out a desk calendar due for delivery in 2026, do not rush to fill the dates to the trim frame: get the binding method, page-turn direction, and hole-position template in hand first, then draw the content safety line. One reminder: this check applies to punched bindings such as coil and wire ring; if you switch to perfect binding or a cardstock easel stand, the clearance logic must be recalculated and cannot be directly reused.
-
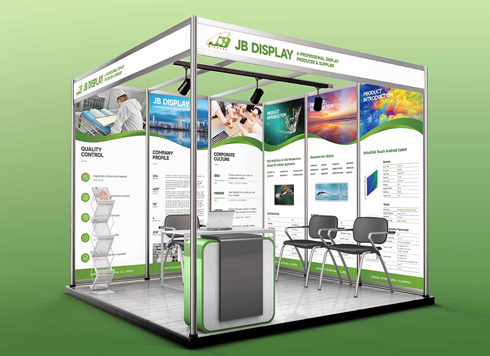 Booth Poster Design for Professional Monitor Product Suppliers
The standard exhibition booth poster projec ...
-
 Design of Standard Exhibition Booth Posters for Beauty Instruments
Carefully designed a standard exhibition bo ...
-
 Design of Exhibition Posters for Medical Device Standards
XiYue is designing an exhibition booth post ...
-
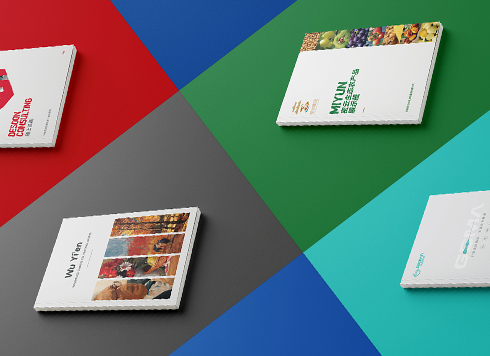 Collection of Brochure Design Cases in 2024 (Cover Series 02)
Our brochure design projects focus on diver ...
-
When a sample is shipped to another city and the client only signs back “OK,” who is to blame if mass production shifts color? Were the reference and tolerance missing from the approval form from the start?
Date: Nov 22, 2026 Read: 3
-
When text at both ends of a banner is pinched by rope, is moving the text inward enough—and should hole positions and hanging method be marked together?
Date: Nov 21, 2026 Read: 5
-
When the company name on a booth fascia can’t be read across the aisle, can checking letter height and stroke weight against the far viewing distance before artwork start save a reprint?
Date: Nov 20, 2026 Read: 11
-
The address along the bottom of a roll-up banner keeps getting covered by the base—can leaving a keep-out zone from the supplier die line before artwork save a site rework?
Date: Nov 19, 2026 Read: 13
-
The booth spotlight hits the center of the display panel, and customers at the meeting table say it is a washed-out white blur—is it material glare or a light mounted too low?
Date: Nov 18, 2026 Read: 18